(Automatic translation with DeepL)
In this post I will tell you how to create a development environment for LearningML: the first step to develop new features, fix bugs in the project or just to tinker with the code.
To begin with, you need to know that LearningML consists of two javascript-based applications:
- The Machine Learning model editor (learningml-editor).
- The lml-scratch programming editor.
The first one has been built with Angular and the second one with React. The tools that these javascript development frameworks offer to perform tasks such as code base generation, transpilation or execution of a development server, are based on node.js. Therefore, the first thing we need to set up our environment is to install node.js. In the following videos you can learn how to do it in the different operating systems (Windows, MacOS and Linux).
Note: As I recorded the videos some time ago, the version of node.js will have changed, which is not a problem. Use the most current version when you go to install it.
These videos are part of a course on javascript that I put together to reveal key aspects of this programming language. I recommend you to follow it if you want to go deeper into javascript.
Installing node.js in MacOS
Installing node.js in Windows 10
Installing node.js in Ubuntu
The next tool we need is git, a version control system, since the LearningML code, with all its history, is hosted in gitlab, a service for development projects that uses git for version control. It is very easy to install on any operating system (Windows, MacOs or Linux).
Other services similar to gitlab are github (possibly the best known) and bitbucket.
If you want to learn how to use git, don’t hesitate to read the free pro-git book. It is, in my opinion, one of the best resources for learning git.
Text editor
And finally you will need a text editor to visualize and modify the code. Notepad (on windows), TextEdit (on MacOs) or nano (on Linux) will do, but I recommend something more powerful and focused on code manipulation. Specifically my choice is Microsoft Visual Studio Code. The following video reviews the main functions of this great editor (which is also free and open source).
Already have node.js, git and Microsoft Visual Studio Code (or another editor you like better) installed?
It’s time to get the code and get going!
Note: Well, in reality something is missing that, although it is not absolutely essential, it helps a lot in development tasks: a command line interface (CLI – Command Line Interface), also known as command terminal. It is an application devoid of interactive graphic elements, such as buttons, menus, sliders, provided by operating systems and through which applications are executed and controlled exclusively with the keyboard. As I say, it is not absolutely essential because almost all the commands that are launched from it can also be launched from the code editor or other applications with graphical interface. Anyway, for me at least, it is much more comfortable than its graphical alternatives. In the following video I tell you more about it.
Deployment of Machine Learning model editor (learningml-editor)
With all the arsenal of development tools we have just seen, we start by bringing the learningml-editor code from gitlab (remote) to our computer (local). This operation is called cloning, and is done from a command interface like this:
# git clone https://gitlab.com/learningml/learningml-editor
Once you have finished executing the above command, you will have a new folder named learningml-editor, which contains the source code of the application. You can now open it in the text editor and “poke” around inside the code.
However, that code cannot yet be executed. The dependencies (or third-party libraries) are missing, i.e. code that the developer has not necessarily written, but has used to build the application. In the package.json file, all the dependencies required by this project are declared. To install them, just launch the following command from the terminal from within the learningml-editor directory:
# npm install
When it finishes its execution, you will see that a directory called node_modules has been created, where you will find all the third-party libraries used for the development of the application, for example those of the Angular framework. And now you can run the application running the Angular development server:
./node_modules/@angular/cli/bin/ng serve
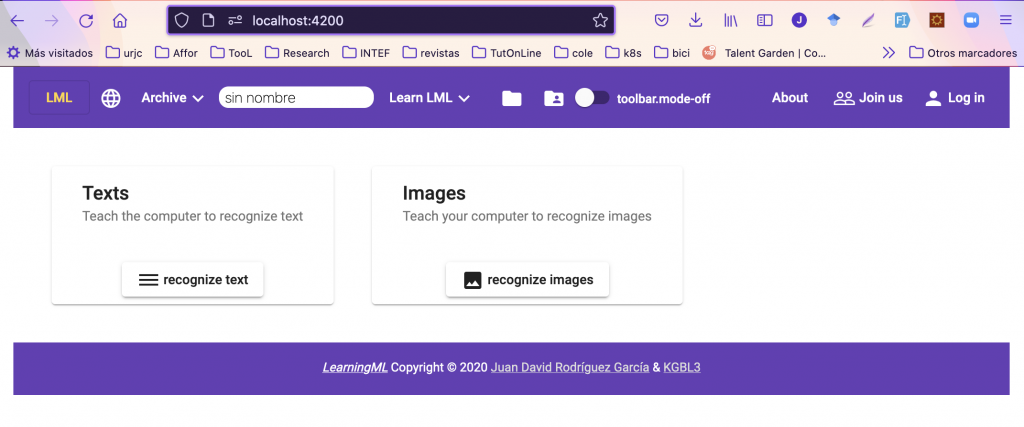
Este comando compila el código, construye la aplicación y la sirve en un servidor web de desarrollo que escucha en el puerto 4200. Así que para acceder a la aplicación, debes abrir un navegador web y apuntar a la dirección http://localhost:4200.
From now on, when you make a change to the source code, the application will be automatically recompiled and reloaded in the browser. This way you will see the effect of the change you have made. And that’s it, you now have a development environment for the learningml-editor application.
Deployment of the programming editor (lml-scratch)
To set up our programming editor development environment (lml-scratch), we will follow the same idea: 1) install the dependencies, 2) build the application and run it on a development server.
But, in this case, there is more to tell. It turns out that lml-scratch is a modification of the well-known Scratch project. That is to say, I have taken the original Scratch code and added the necessary code to communicate with the ML model editor and to incorporate new blocks. That on the one hand.
On the other hand, the code of the original Scratch project, hosted on github, is divided into several repositories. One of these repositories, scratch-gui, is the one that acts as the main application, and the rest are installed as dependencies of that application. Of all the projects that make up the Scratch application, I had to make modifications to three of them: scratch-gui, scratch-vm and scratch-l10n. So, the goal is to install the main application (scratch-gui) and to change it so that the scratch-vm and scratch-l10n dependencies are obtained from the source code of the learningml repositories instead of the official node.js dependencies repositories. Let’s see how.
First we make a clone of the three projects:
# git clone https://gitlab.com/learningml/lml-scratch-gui
# git clone https://gitlab.com/learningml/lml-scratch-vm
# git clone https://gitlab.com/learningml/lml-scratch-l10n
Note: Note that these repositories are the modified code repositories, not the original ones.
Now we go into the lml-scratch-l10n directory and install the dependencies
# cd lml-scratch-l10n
# npm install
And now comes the trick: we tell the node.js package manager (npm) that we want to have our own local copy of the scratch-l10n dependency:
# npm link
We do the same with lml-scratch-vm:
# cd ..
# cd lml-scratch-l10n
# npm install
# npm link
And the same with lml-scratch-gui:
# npm link scratch-vm
# npm link scratch-l10n
Et voilà!
Now the lml-scratch-gui project uses our local versions as dependencies for scratch-vm and scratch-l10n. So, when you make changes in any of the lml-scratch-vm or lml-scratch-l10n projects, they will be reflected in the application.
Note: Throughout this application there is a subtlety that deserves some thought to understand. It is the names scratch-[anything] and lml-scratch-[anything]. The former is used as the name of the dependency (what it says in the package.json file), while the latter is used as the name of the code repository. Even if the name of the repository (and the local folder) are lml-scratch-[anything], the name of the dependency is still the original (scratch-[anything].
And now we can run our version of Scratch with LearningML blocks:
# npm start
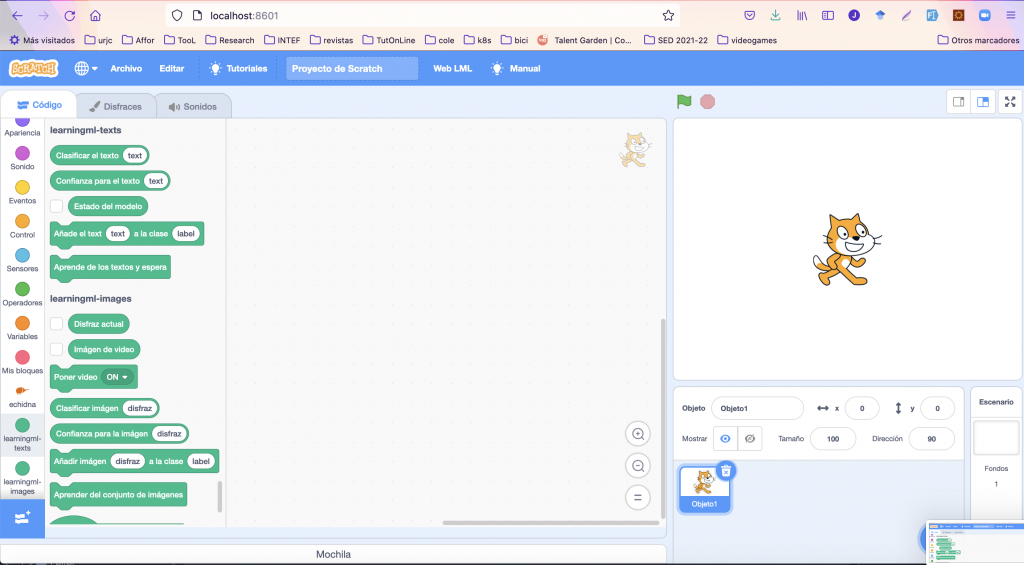
After a short while, when the application has been built and the Scracth development server is up, we can access it with our web browser by pointing it to http://localhost:8601.